Hey there, fellow traveler. If you are sitting at your desk right now, staring at a computer screen and dreaming of a place where the only sound is the wind through the trees, I know exactly how you feel. Not too long ago, I was locked into that rigid 9-to-5 corporate grind in New York. I used to stare out the office window, feeling like my life was ticking away in fifteen-minute increments of vacation time. When I finally broke free, worked as a certified New York sightseeing guide, and spent months waitressing just to fund my plane tickets, I had to learn how to rely entirely on myself.
Hitting a trail alone can feel terrifying. Your mind starts racing with questions: What if I get lost? What if I run out of water? What if I pack too much and my back gives out miles away from civilization?
That is why I put together this massive guide. This is not just a generic gear list. This is the ultimate hiking packing checklist built specifically for solo travelers who need to be completely self-reliant, safe, and comfortable on the trail. We are going to break down every single item you need, how to choose it, what to eat to keep your energy high, and how to navigate safely when nobody else is there to lead the way.
1. The Big Three: Pack, Shelter, and Sleep System
When you are hiking alone, your gear is your home. If your backpack hurts your shoulders or your tent leaks, there is no one else to swap gear with. You have to carry everything on your own back, so choosing lightweight, durable items is a must.
Choosing Your Backpack
Your backpack is the foundation of your entire trip. For a long day hike, a 20 to 30-liter pack is perfect. If you are planning an overnight solo adventure, you will need a 45 to 65-liter pack.
Look for a pack with a thick, padded hip belt. Your hips should carry 80 percent of the weight, not your shoulders.
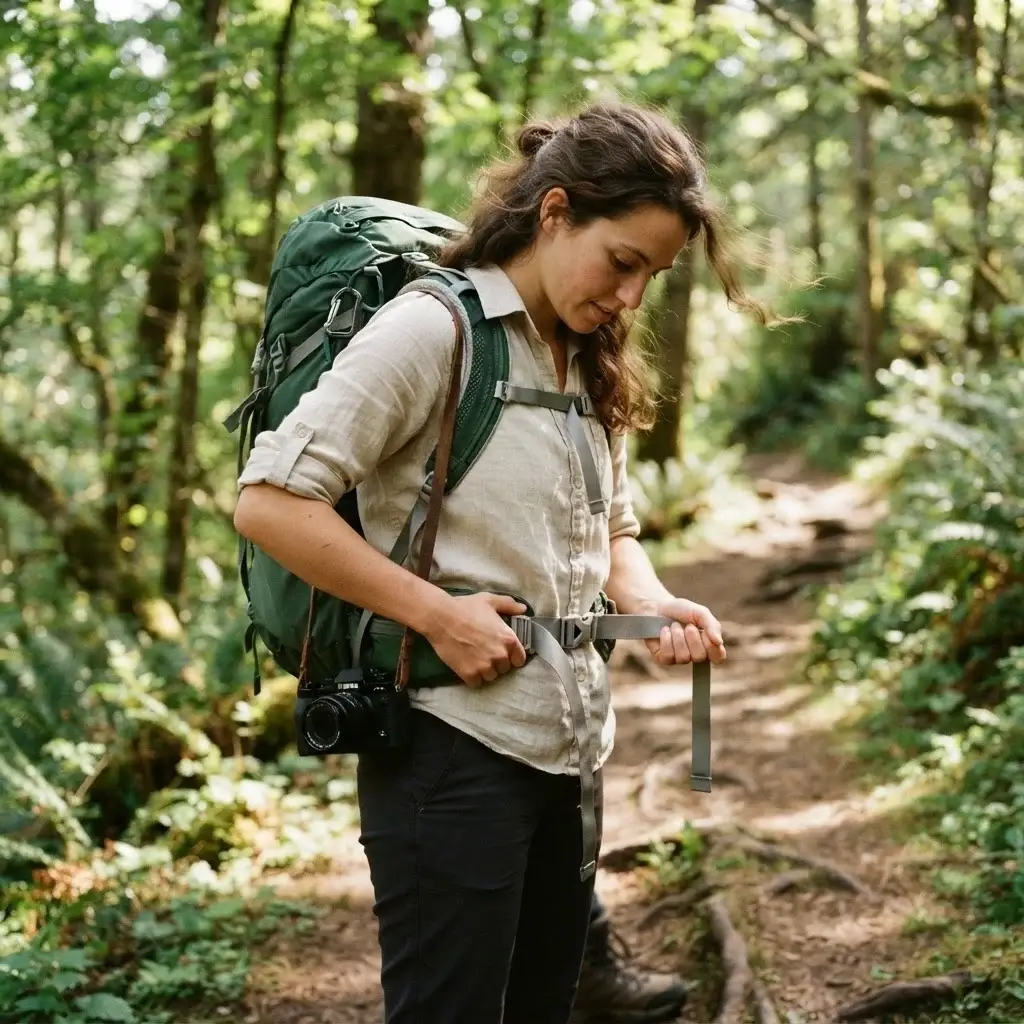
When I was saving up money by working extra shifts, I made the mistake of using a cheap, ill-fitting school backpack for a mountain hike. By mile four, my shoulders were raw and bleeding. Do not do that to yourself. Go to a local outdoor store, ask them to put weight inside the pack, and walk around the store to see how it feels against your lower back.
Solo Tents and Shelters
If you are staying out overnight, a one-person or lightweight two-person tent is your best friend. Look for a double-walled tent. This means it has a separate inner mesh body and an outer waterproof rainfly. This design stops condensation from building up inside the tent from your breath. There is nothing worse than waking up alone at 4:00 AM with cold water dripping on your face.
The Sleep System
Your sleep system includes your sleeping bag and your sleeping pad. Sleeping pads are not just for comfort; they block the freezing cold ground from sucking the warmth right out of your body. Look for a pad with an R-value of 3.0 or higher for three-season hiking. For your sleeping bag, always choose one that is rated at least 10 degrees colder than the lowest temperature you expect to meet.
2. Navigation Tools: Staying Found When You Are Alone
When you travel solo, navigation is entirely your responsibility. You cannot rely on a friend to read the map. You need a main navigation system and at least two backup plans.
Satellite Communicators
A satellite communicator is an absolute must-have item on your ultimate hiking packing checklist. These devices allow you to send text messages to your family even when you have zero cell phone service. More importantly, they have an SOS button. If you fall and break an ankle, pressing that button alerts local search and rescue teams of your exact coordinates. It gives your family peace of mind, and it gives you the confidence to explore remote areas.
Topographic Maps and Compasses
Electronics can die, get wet, or freeze in cold weather. You must carry a physical, waterproof topographic map of the specific trail you are hiking.
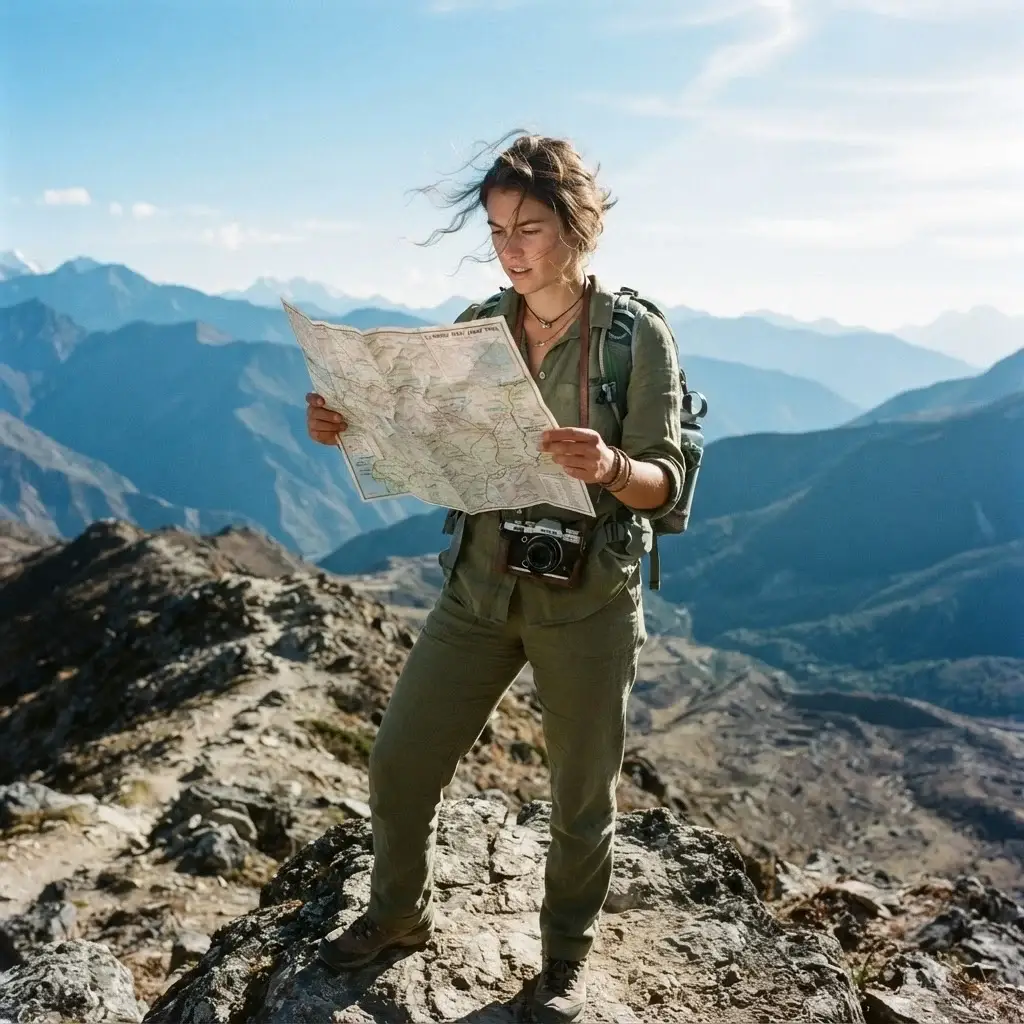
Learn how to read contour lines, which show you how steep the hills are. Pair this with a simple magnetic baseplate compass.
Before you leave the trailhead, look at your map to see which direction the main road lies. If you get completely turned around and your electronic devices fail, that compass will guide you back toward safety.
Smartphone Apps
Download offline trail maps on apps like AllTrails or Gaia GPS before you lose cell service. Keep your phone on airplane mode to save battery life. A great insider secret is to keep your phone inside your sleeping bag at night. Cold air drains smartphone batteries incredibly fast, and your body heat will keep the battery full.
3. The Clothing Layering System
Weather in the wilderness changes fast. I remember hiking through a beautiful valley in sunny weather, and within thirty minutes, a sudden thunderstorm dropped the temperature by twenty degrees.
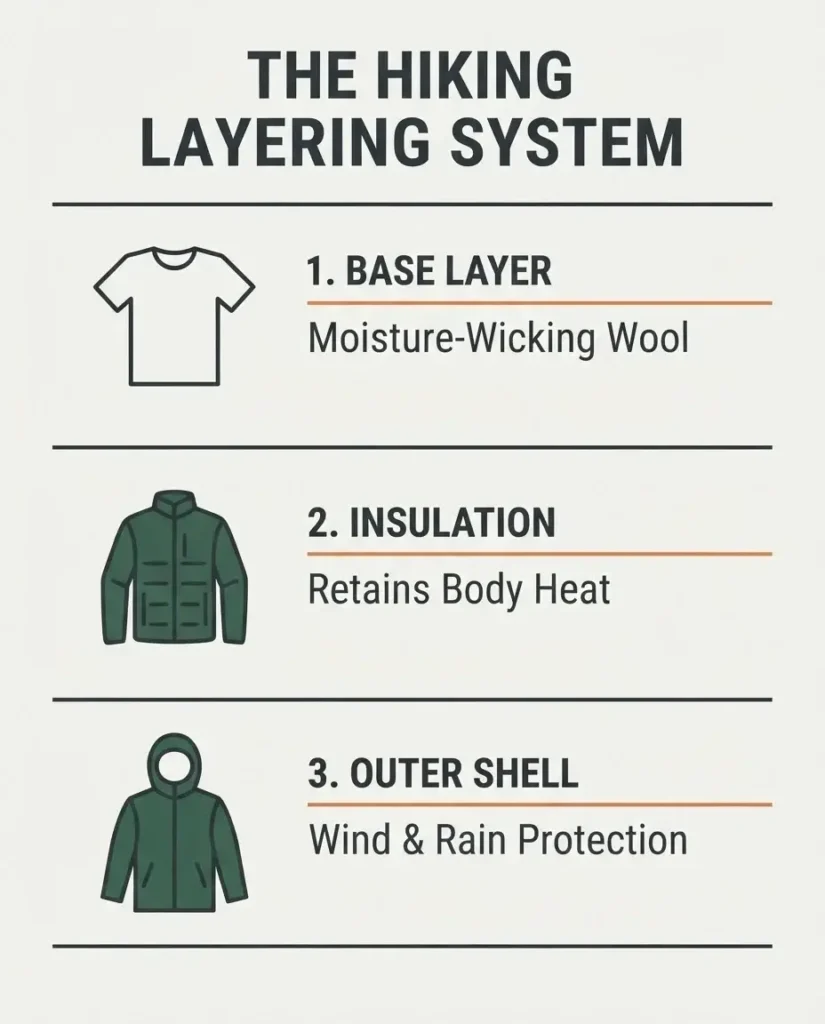
Because I understood how to layer my clothing, I stayed dry and safe.
The Base Layer
This is the shirt that touches your skin. It must be made of synthetic materials like polyester or natural merino wool. These fabrics pull sweat away from your body, a process called wicking. Never, ever wear cotton on a hike. Cotton holds onto water like a sponge. If you sweat through a cotton t-shirt and the wind picks up, you can easily get hypothermia, even in the summer.
The Insulation Layer
This layer keeps your body heat inside. A lightweight fleece jacket or a packable down jacket works perfectly. Down jackets are incredibly warm and compress down to the size of a water bottle, making them perfect for solo hikers who need to save space in their packs.
The Outer Shell
Your outer layer must be a fully waterproof and windproof rain jacket. Look for jackets with taped seams and a hood that cinches tightly around your face. This layer acts as a shield against rain, snow, and freezing winds.
Proper Hiking Socks and Footwear
Your feet are what get you home. Buy dedicated hiking socks made of merino wool or nylon blend. They prevent friction, which is the main cause of painful blisters. For footwear, choose sturdy trail running shoes for well-maintained paths, or high-top hiking boots if you are carrying a heavy pack over rocky, uneven terrain.
4. Hydration and Water Filtration
Water weighs about two pounds per liter, making it one of the heaviest things in your backpack. However, running out of water is a dangerous mistake when you are alone. You need to carry enough water and have a way to make more water safe to drink along the way.
How Much Water to Carry
As a general rule, you should drink about half a liter of water for every hour of moderate hiking in normal temperatures. If it is hot or steep, you will need much more. Carry at least two liters of water with you at all times. Use a durable water bladder with a hose for easy sipping while walking, and keep a backup tough plastic water bottle in your side pocket.
Water Filtration Systems
Never drink directly from a mountain stream, no matter how clear and clean the water looks. Wild animals live near those streams, and the water can be contaminated with microscopic parasites like Giardia, which can cause severe stomach issues.
Carry a lightweight squeeze filter or a straw filter. These devices use tiny hollow fiber membranes to strain out bacteria and parasites. Always carry backup chemical purification tablets in your first aid kit just in case your main filter cracks or freezes.
5. Trail Nutrition: Food and High-Energy Snacks
When you are hiking miles up a mountain, your body burns calories like a furnace. If you do not eat enough, your blood sugar drops, you get dizzy, and your decision-making skills suffer. When you are by yourself, staying sharp is your number one safety tool.
High-Calorie Packing List
Choose foods that have a high calorie-to-weight ratio. This means you want foods that pack a ton of energy into a lightweight package. Great options include:
- Unsalted nuts and seeds (almonds, walnuts, pumpkin seeds)
- Peanut butter or almond butter packets
- Dehydrated or freeze-dried meals (just add hot water)
- Beef or turkey jerky
- Dark chocolate and energy bars
What to Eat on the Trail
For breakfast, choose instant oatmeal packets mixed with a scoop of protein powder and dried fruit. It gives you slow-release carbohydrates to fuel your morning steps.
For lunch, avoid foods that require cooking. I like to eat whole-wheat tortillas wrapped around peanut butter and honey.
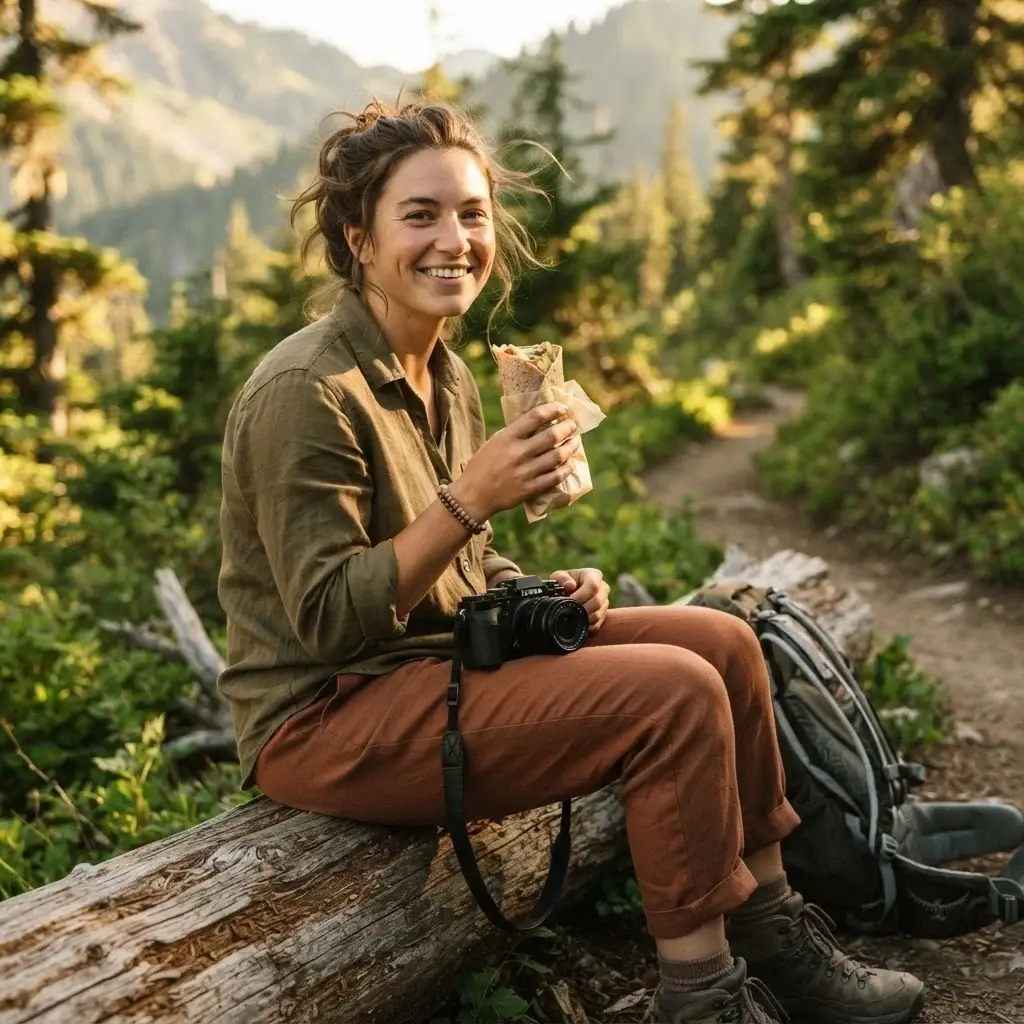
It is durable, does not smash in your pack, and gives you an instant energy boost.
For dinner, a hot, savory meal is amazing for your mental state. Eat a freeze-dried meal right out of the pouch so you do not have to wash a dirty pot in the dark.
6. First Aid, Safety, and Emergency Preparedness
If an emergency happens on a solo trip, you are the first responder. A proper first aid kit must be an uncompromised part of your ultimate hiking packing checklist.
Building Your First Aid Kit
Do not just buy a pre-made family first aid kit from a grocery store. Those are full of items you do not need on a mountain trail.
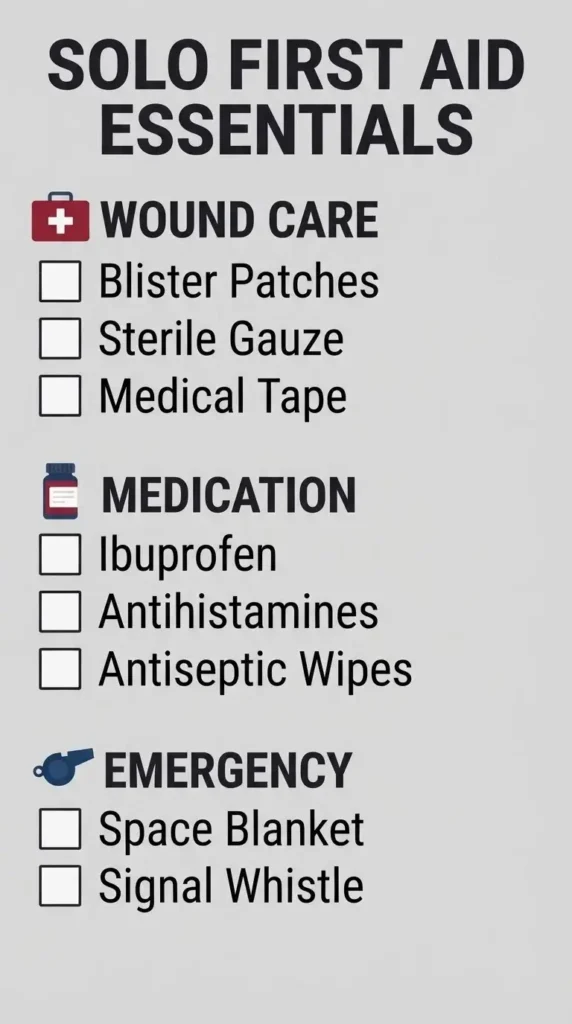
Instead, build a compact, waterproof kit that contains:
- Blister treatment patches (Mole-skin or hydrocolloid bandages)
- Various sizes of sterile adhesive bandages
- Antiseptic wipes to clean out cuts and scrapes
- Ibuprofen or acetaminophen to reduce pain and swelling
- Antihistamine pills for unexpected allergic reactions or bug bites
- A small roll of medical tape and sterile gauze pads
Emergency Blanket and Whistle
Always pack a shiny, lightweight space blanket. It reflects 90 percent of your body heat back to you if you are forced to spend an unexpected night in the woods. Additionally, make sure your backpack has a loud emergency whistle attached to the sternum strap. Your voice will give out quickly if you are yelling for help, but a whistle can blow loudly for hours and carries much further through dense trees.
Safety Planning and Medical Hazards
Before you pack your bags and head out into the wilderness, it is incredibly smart to check for any local medical hazards or health warnings for the region you are visiting. To ensure I have the most accurate health information before any major trip, I always look at the official CDC Travelers’ Health site for destination-specific medical notices and vaccine guidance to stay fully informed. Knowing about regional tick-borne illnesses or water safety warnings beforehand lets you pack the right protective gear, like high-strength permethrin spray or specific water treatment tablets.
7. Hygiene, Waste Management, and Leave No Trace
Taking care of your body and the environment is a major part of becoming an experienced, mature outdoor explorer. We must protect the wild places we love so they stay beautiful for the next generation.
Personal Hygiene Items
Pack a small hygiene kit inside a clear, locking plastic bag. Include a travel-sized bottle of alcohol-based hand sanitizer, a small pack of biodegradable wet wipes, and a small tube of reef-safe, biodegradable soap. Always sanitize your hands thoroughly before eating and after using the bathroom to avoid getting yourself sick on the trail.
How to Poop in the Woods
This is something many people are afraid to talk about, but it is a natural part of long hikes. You need to carry a lightweight plastic or aluminum backpacking trowel. If nature calls and there are no toilets around, walk at least 200 feet away from any trail, campsite, or open water source.
Use your trowel to dig a hole that is six to eight inches deep. After using the hole, cover it completely with the natural soil you dug out and press it down. Pack out your used toilet paper inside a separate, solid-colored trash bag. Never bury wet wipes, as they do not break down in nature and wild animals will dig them back up.
8. Illumination and Tool Kit
When the sun goes down in the wilderness, it gets incredibly dark. You cannot rely on your phone’s flashlight, because that drains your main navigation battery.
Headlamps Over Flashlights
A lightweight headlamp is far superior to a handheld flashlight. It straps securely to your forehead, leaving both of your hands completely free to pitch your tent, cook dinner, or hold your trekking poles in rough terrain. Always pack an extra set of lithium batteries or a backup charging cable if your headlamp uses a rechargeable battery.
Multi-Tools and Knife
A simple, sharp pocket knife or a compact multi-tool is incredibly useful. You can use it to cut gear repair tape, slice up cheese for lunch, or repair a broken backpack strap. You do not need a massive, heavy survival knife; a small tool with a blade, scissors, and a small pair of pliers is perfect.
Gear Repair Kit
Pack a small roll of heavy-duty duct tape or tenacious gear repair tape. Wrap a few feet of the tape around your trekking poles or your water bottle so you do not have to carry a whole heavy roll. If your tent rips or your shoe sole peels away, this tape will save your day.
9. Local Cultural Respect and International Travel Safety
Hiking is not just about looking at trees and mountains; it is often about visiting communities that have lived in these beautiful regions for centuries. When your travels take you across borders to explore stunning trails worldwide, safety and cultural awareness go hand in hand.
Respecting the Local Environment and Communities
Whenever I plan an international trekking trip, I make sure to research the area thoroughly to ensure I am traveling responsibly. For example, if you are planning to hike near historical ruins or protected global landscapes, it is deeply helpful to look up the official UNESCO World Heritage list of protected cultural sites to understand the strict rules regarding conservation and entry. Respecting these boundaries ensures that fragile historic footpaths and local community ecosystems are preserved for future generations.
Practical Travel Planning and Safe Logistics
Before you step onto a plane to hike in a foreign country, your ultimate hiking packing checklist should expand to cover basic travel safety and documentation. To help me navigate entry requirements, international travel alerts, and regional safety ratings, I regularly consult the US Department of State Travel advisories for international destinations before booking any flights. Knowing the local emergency phone numbers, visa requirements, and transit rules gives you the ultimate baseline of security so you can focus on the natural beauty of the trail.
10. Solo Hiking Skills: Step-by-Step Trail Checklist
Now that you know exactly what gear needs to go into your backpack, let us walk through the exact steps you should take on the day of your adventure to ensure everything runs perfectly smoothly.
1.Share Your Trip Plan:Before Leaving Home.
Write down your exact trail route, the location of your parked car, and your expected return time. Give this document to a trusted friend or family member. Tell them exactly who to call if you do not check in by a specific time.
2.Check the Weather and Trail Conditions:At the Trailhead.
Check the local mountain forecast right before you lose cell service. Talk to local park rangers to see if there are any recent mudslides, broken bridges, or aggressive wildlife sightings along your path.
3.Adjust Your Pack and Gear:First Mile.
Stop after twenty minutes of walking to adjust your backpack straps. Your body changes shape as you warm up. Make sure the weight is resting comfortably on your hips and adjust your clothing layers before you start sweating heavily.
4.Monitor Your Milestones:Throughout the Day.
Keep a close eye on your map and your watch. Calculate your average walking speed. If it takes you longer than expected to reach a landmark, remember that it is always brave and smart to turn around early rather than get stuck hiking in the dangerous dark.
The Master Ultimate Hiking Packing Checklist
Here is a quick, scannable summary list that you can review right before you walk out your front door. Copy this list into your notebook or take a screenshot on your phone.
| Category | Must-Have Item | Purpose |
| The Big Three | Backpack, Tent, Sleep System | Your shelter and mobile home on the trail. |
| Navigation | Satellite Communicator, Map, Compass | Keeps you connected and on the correct path. |
| Clothing | Wicking base layers, Fleece, Rain shell | Protects your body from sudden weather shifts. |
| Hydration | 2L Water capacity, Squeeze water filter | Prevents dehydration and illnesses from bad water. |
| Nutrition | High-calorie snacks, Dehydrated meals | Fuels your muscles and keeps your mind clear. |
| Safety | Personalized First Aid Kit, Headlamp, Whistle | Your primary defense if an accident happens. |
Remember, solo hiking is not about showing the world how tough you are. It is about building a quiet confidence, listening to the rhythm of your own footsteps, and learning to trust your own judgment. Every mistake you make and overcome makes you a stronger, more independent traveler. So pack your bags carefully, double-check your map, leave your fears behind, and take that first step onto the trail. The world is waiting for you.