I still remember the humid July afternoon I stood on a train platform in Bangkok, sweat dripping down my neck, staring at my massive 70-liter backpack. It was stuffed to the brim with things I thought were absolute survival items: three heavy cotton sweaters, a pair of rigid hiking boots I had barely broken in, a bulky professional hair dryer, and a stack of physical travel guidebooks. I had just walked away from my secure, predictable 9-to-5 corporate office job in New York to pursue a life of slow, deep travel. Yet there I was, physically pinned down by my own luggage, unable to board the crowded train without hitting three people.
Before that, during my years working as a certified sightseeing guide in New York City, I used to watch tourists drag giant, wheeled suitcases over cracked sidewalks and subway stairs. I always thought to myself, “When I finally travel full-time, I will do it differently.” But the moment fear took over during my own trip planning, I fell into the classic trap. I packed for every worst-case scenario instead of packing for reality.
If you are currently sitting at your desk, daydreaming about booking a one-way ticket to Chiang Mai or planning a trek through the high Andes, let me tell you something right now: the perfect time to travel will never just appear. You have to create it. And when you do, your gear should give you freedom, not hold you back.
To help you skip the painful learning curve I went through, let’s unpack the essential items for adventure travelers by breaking down the five biggest packing mistakes you need to fix before you leave home.
Mistake 1: Choosing the “Just in Case” Mentality Over Modular Versatility
When you sit down to sort out your items, your brain will play tricks on you. It will whisper, “What if you get invited to a formal gala dinner while backpacking through the rural hills of northern Vietnam?” Or, “What if the temperature drops to freezing while you are staying in a tropical surf village?”
This anxiety causes travelers to pack heavy, single-use items. You do not need a separate outfit for every potential weather system or social situation. Instead, you need a highly intentional, modular clothing system built around technical layers that work together.
The Power of Merino Wool and Lightweight Synthetics
Cotton is the ultimate enemy of the adventure traveler. It holds moisture, takes days to dry on a hostel clothesline, and starts to smell after a single afternoon of walking. When I was teaching English in Thailand, the intense humidity taught me that synthetic fabrics and merino wool are worth every single penny.
Your base layer should always be a moisture-wicking shirt. Merino wool is incredible because it naturally resists odors. You can wear a high-quality merino wool t-shirt for three days of active trekking, hang it up to air out overnight, and it will smell perfectly fresh the next morning.
Building Your Core Layering System
Instead of a heavy winter coat, use a three-piece system that adapts to any environment on earth:
- The Base: A short-sleeve merino wool or polyester tee.
- The Insulation: A lightweight, packable grid fleece or a synthetic down jacket that compresses into the size of an apple.
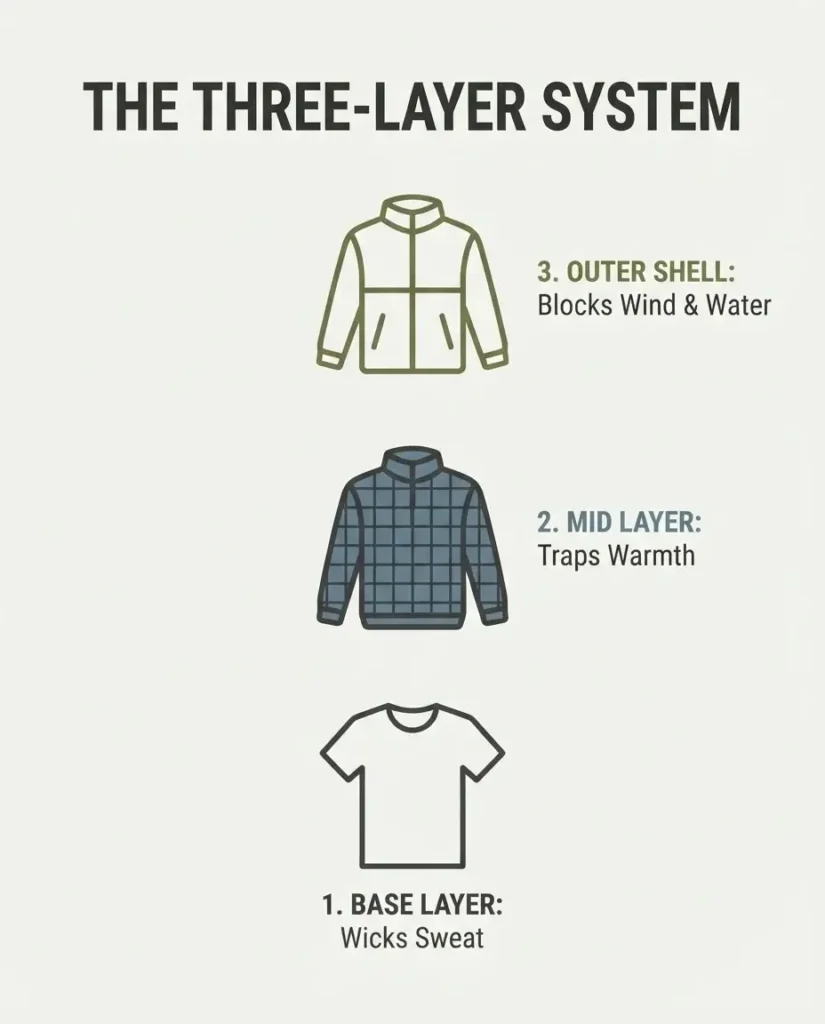
- The Weather Shield: A breathable, fully waterproof rain jacket with taped seams.
If you are chilly while walking through the windy streets of Cusco, Peru, you wear all three. If the sun comes out, you strip down to the base layer and roll the jacket into your daypack. This modular approach ensures you are prepared for temperatures ranging from 40°F (4°C) to 85°F (29°C) using only three light items.
Insider Navigation and Practical Tips for Layering
When you are packing, lay every item out on your bed. Take away half of the clothes and double the amount of money you think you need. To save up for my first big trip, I spent months waitressing extra shifts on weekends, and I can tell you that having a bit of extra cash in your pocket is infinitely more useful than carrying a fourth pair of jeans.
For pants, choose quick-dry nylon or polyester blends with built-in stretch. Avoid heavy canvas or denim. Look for pants that can be rolled up and secured with a button, which is perfect for wading through shallow rivers or walking through hot local markets.
Mistake 2: Bringing Heavy, Uncomfortable Footwear Without Breaking It In
Footwear can completely make or break your trip. I once met a traveler in a cafe in Antigua, Guatemala, who had spent months saving for a beautiful, heavy pair of all-leather mountain boots. He wore them for the first time to hike up the active Acatenango volcano. By the second hour, his heels were covered in bleeding blisters, and he had to turn back, missing an incredible sunrise over the erupting lava.
The Evolution of the Trail Runner
The days of needing massive, rigid, over-the-ankle leather boots for general adventure travel are over. Unless you are carrying a 50-pound pack over jagged glacial moraines, your feet will be much happier in a pair of high-quality trail running shoes.
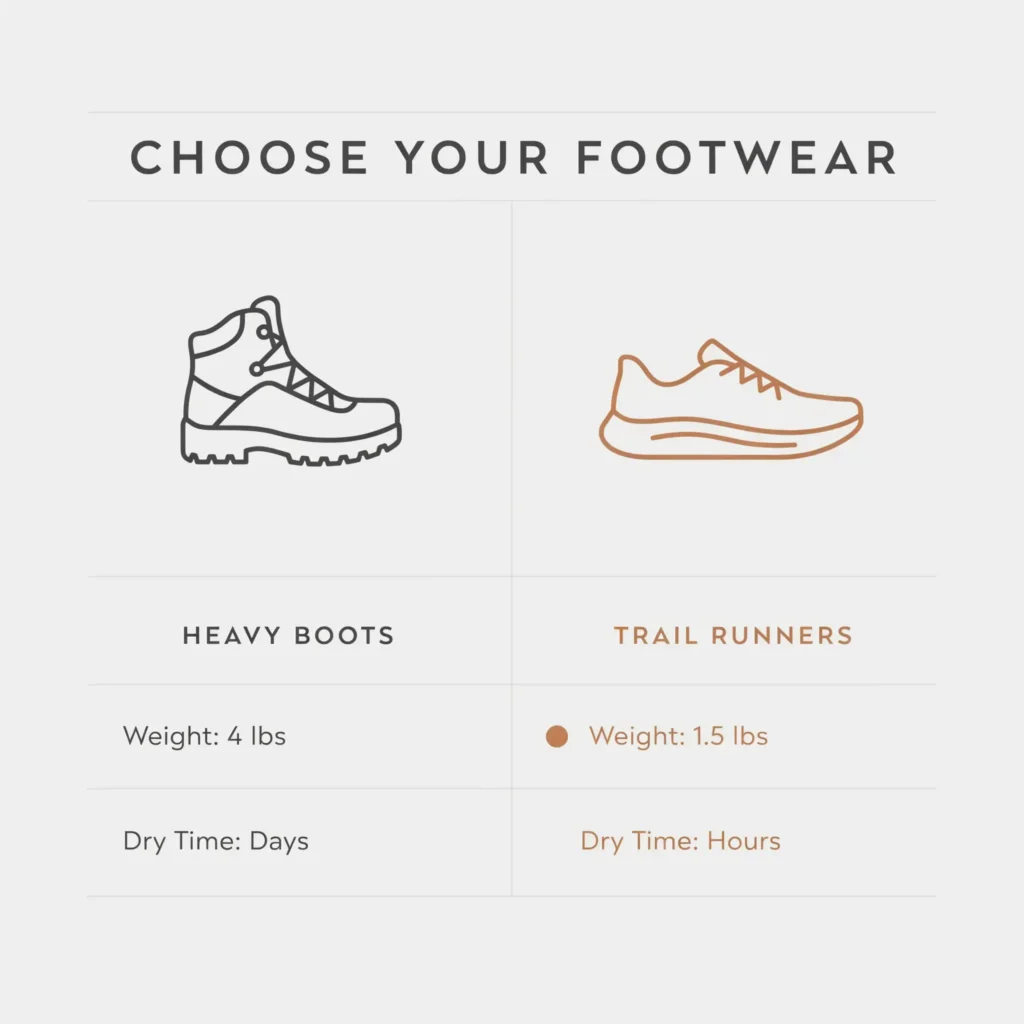
Trail runners offer the best of both worlds: they have deep, aggressive rubber lugs on the sole to grip mud, wet rocks, and loose dirt, but they are built like a lightweight running shoe. They allow your feet to flex naturally, breathe easily in hot weather, and dry out within hours if you step into a deep puddle.
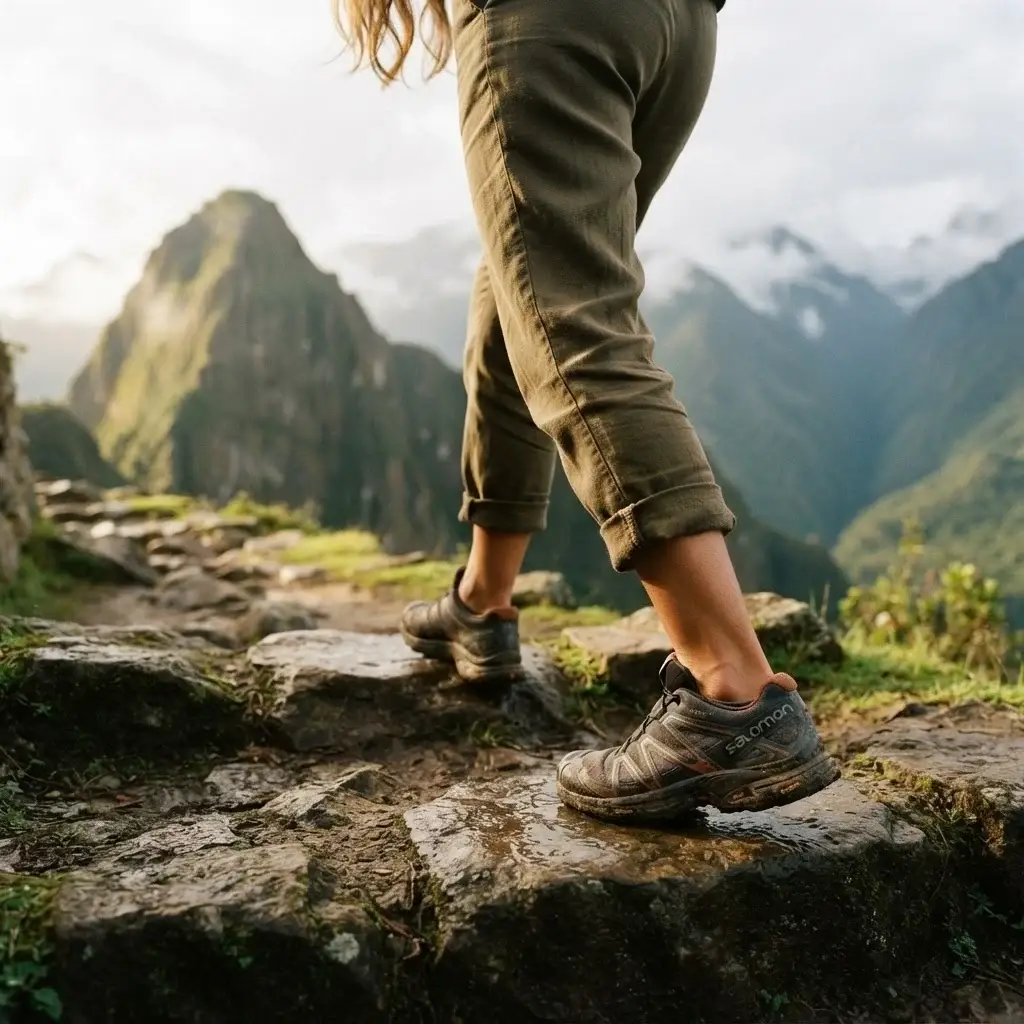
Brands like Altra, Salomon, and Hoka make incredible trail runners that look normal enough to wear through an airport or around a city.
The Two-Shoe Rule
You only need two pairs of shoes for any adventure trip:
- Pair 1: Your primary trail running shoes. You will wear these on planes, buses, mountain trails, and city walking tours.
- Pair 2: A pair of lightweight, durable adventure sandals with a secure heel strap (such as Chacos, Tevas, or Bedrock Sandals).
Never pack flimsy cheap plastic flip-flops as your main footwear. A solid adventure sandal allows your feet to breathe on hot days, can be worn while swimming in rocky rivers, and keeps you safe in communal hostel showers.
Culinary and Cultural Tips for Footwear Etiquette
When traveling through Southeast Asia, particularly in places like Thailand or Cambodia, you will be taking your shoes off constantly before entering homes, local shops, and sacred temples. If you wear complicated hiking boots with 12 eyelets to lace up every time, you will quickly become frustrated.
Trail runners that slip on and off easily, or secure sandals, make respecting local cultural customs a breeze. Before you visit these sacred sites, it is wise to brush up on local guidelines; I always recommend checking out the comprehensive cultural etiquette overviews on the official Tourism Authority of Thailand guide to make sure you know exactly when to uncover your feet and how to dress respectfully.
Mistake 3: Overlooking Health, Safety, and First-Aid Gear
When we dream about our adventures, we picture ourselves looking out over pristine mountain ridges or eating delicious street food in vibrant night markets. We do not like to picture ourselves stuck in a remote guesthouse room with severe dehydration, food poisoning, or a deeply infected cut. Because of this, many adventure travelers either bring a massive, heavy emergency kit meant for a wilderness paramedic, or they bring absolutely nothing at all. Both choices are mistakes.
Building a Streamlined Travel First-Aid Kit
You do not need to carry splints, neck braces, or advanced surgical tools. You do need a small, pocket-sized medical pouch stocked with high-quality, targeted items that treat the most common travel ailments: blisters, cuts, bugs, and stomach bugs.
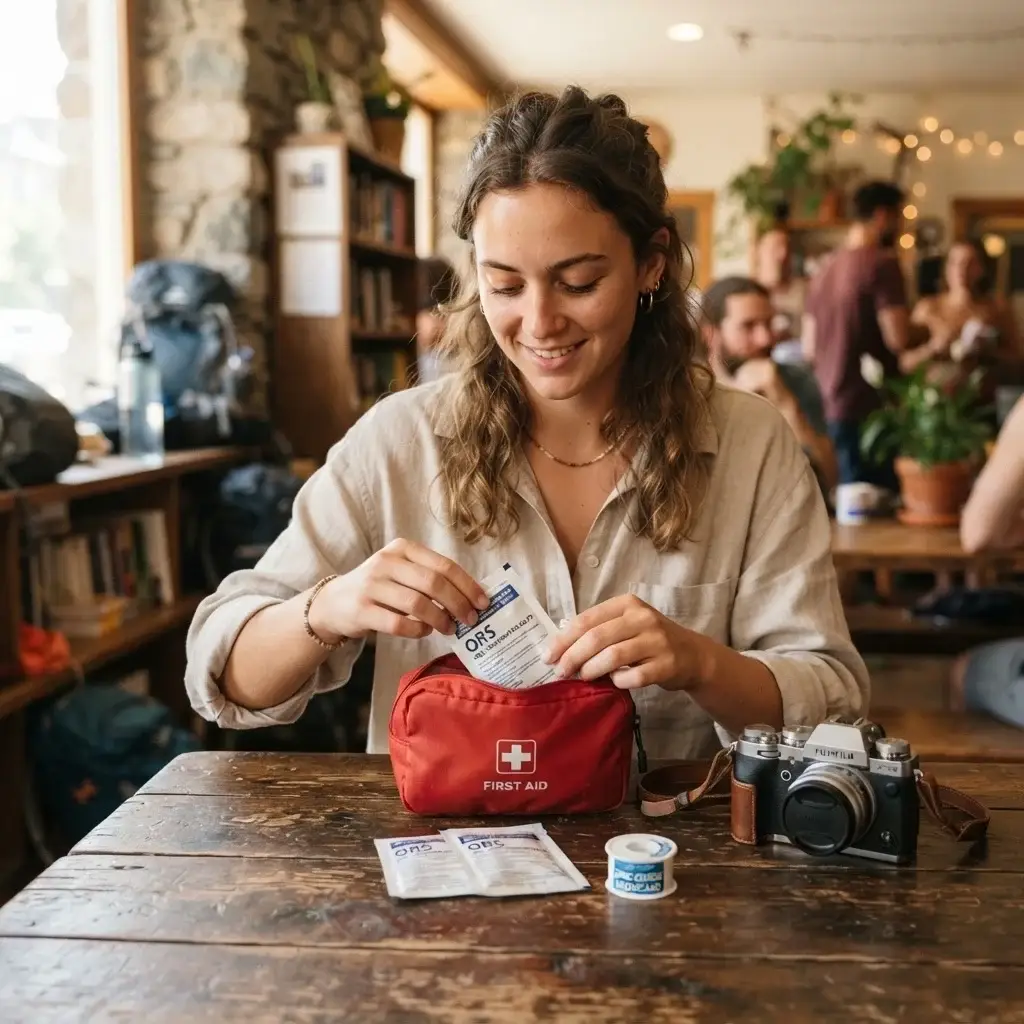
- Blister Prevention: Pack a small roll of zinc oxide tape or specialized blister cushions (like Compeed). The moment you feel a hot spot forming on your foot, stop walking and tape it up.
- Gastrointestinal Relief: Pack a strip of loperamide (for emergency anti-diarrhea support during long bus rides) and oral rehydration salts. When your body loses fluids from heat or illness, drinking pure water isn’t enough; you need electrolytes to bounce back quickly.
- Antiseptic Wipes and Ointment: Every minor scratch or bug bite can quickly turn into a nasty infection in hot, humid tropical climates. Clean wounds instantly with an alcohol wipe and apply a thin layer of antibacterial ointment.
Navigating Destinational Health Requirements
Before you fly out, you must understand that different corners of the world require different physical preparations. To protect your body and ensure you do not get turned away at border control, I always suggest reviewing the latest medical advisories and vaccine requirements directly via the CDC Travelers’ Health platform which provides updated safety data for every country. For example, some countries in South America or Africa strictly require physical proof of a Yellow Fever vaccination if you are arriving from an endemic zone.
Solo Travel Confidence and Safety Logistics
When you are traveling solo, you are your own primary caretaker. Do not rely on finding an open pharmacy at 3:00 AM in a rural village where you do not speak the local language. Carry your essential daily prescription medications in your carry-on bag, never in checked luggage, and keep them in their original pharmacy boxes with your name clearly printed on the label.
To protect yourself against major unexpected accidents, you should also have solid medical insurance coverage. Before I head out into remote regions, I like to double-check my policy terms and read through the emergency evacuation guides found on the World Nomads Travel Insurance info pages to make sure my activities, like high-altitude trekking or scuba diving, are fully covered.
Mistake 4: Carrying a Heavy, Unprotected Tech Setup
It is incredibly tempting to pack like a professional travel content creator. You want the heavy DSLR camera, three different lenses, a motorized gimbal, a laptop for editing, a drone, and a giant power bank. But unless you are earning your entire living directly from commercial photography on the road, this mountain of electronics will quickly become a massive burden. It makes your daypack heavy, turns you into a prime target for petty theft, and forces you to spend your evenings guarding cords in your room instead of connecting with locals in a neighborhood restaurant.
The Lightweight Solo Tech Kit
For 95% of adventure travelers, a modern smartphone is more than powerful enough to document your journey, manage your travel logistics, and keep you safe. The camera sensors in modern phones are spectacular, and they fit right into your pocket, allowing you to take candid, respectful photos without flashing expensive gear in low-income areas.
Aside from your phone, your tech setup should only include:
- A Slim Power Bank: Look for a 10,000mAh external battery that features fast-charging technology. This ensures your phone stays alive during 14-hour bus rides when you are using GPS navigation to find your guesthouse.
- A Universal Travel Adapter: Pick a single, high-quality adapter that includes built-in USB-A and USB-C slots. This allows you to charge your phone, your power bank, and your e-reader simultaneously from a single wall outlet.
- A Compact E-Reader: A single Kindle can hold hundreds of books, destination guides, and cultural documents, saving you pounds of physical paper weight.
Protecting Your Tech from the Elements
Adventure travel means exposing your gear to dust, heavy tropical downpours, and rough handling on boat rides. Never leave your electronics loose in your backpack.
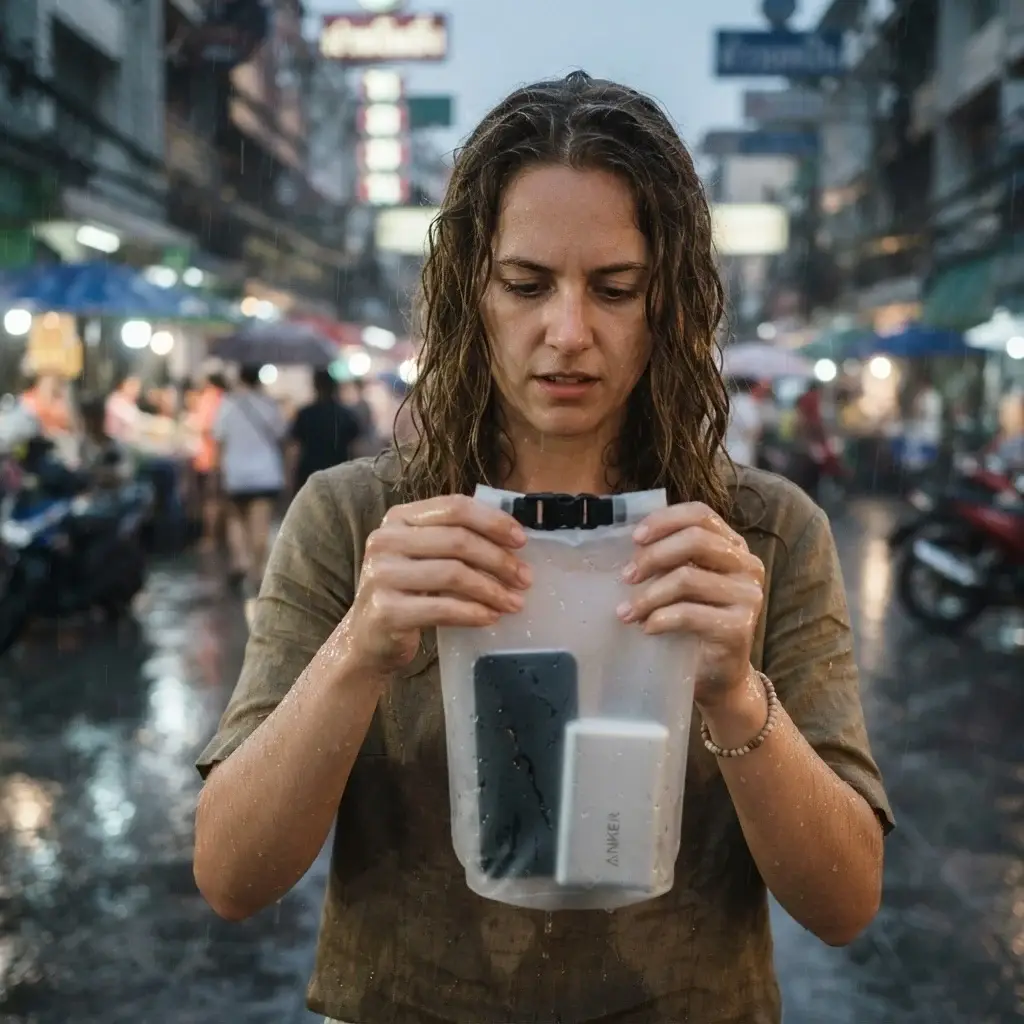
Invest in a few lightweight silicone dry bags or specialized hard cases. If you are caught in a sudden monsoon while riding a scooter in Southeast Asia, you can quickly slide your phone, passport, and power bank into a 3-liter dry bag, roll the top down tight, and rest easy knowing everything will stay completely bone-dry.
Navigation Apps and Street-Smart Logistics
When you arrive in a new city, skip the expensive airport taxis, which often overcharge tired international travelers. In many regions, digital ride-hailing apps are the safest and cheapest way to navigate.
If you are traveling through cities like Jakarta, Kuala Lumpur, or Manila, I highly recommend checking out how to set up your account and link your card securely by looking over the Grab official app features page before you land. It gives you a guaranteed upfront price and tracks your route via GPS, eliminating any language barriers or stressful price negotiations with local drivers.
Mistake 5: Relying on Rigid, Heavy Organizers Instead of Compression Tools
The final mistake is how you pack the items you have chosen. Many people buy beautiful, heavy leather toiletry bags, rigid plastic packing cases, or complex organizational systems that add up to two or three pounds of dead weight before a single item of clothing is even placed inside the pack.
Your goal should be to maximize space while keeping the total weight of your empty bag as low as possible. The best way to do this is by switching to ultra-lightweight nylon compression cubes.
The Art of the Ranger Roll
Do not fold your clothes like you do for your dresser drawers at home. Folded clothes create flat layers that leave empty, wasted pockets of air inside your backpack. Instead, use the “Ranger Roll” method.
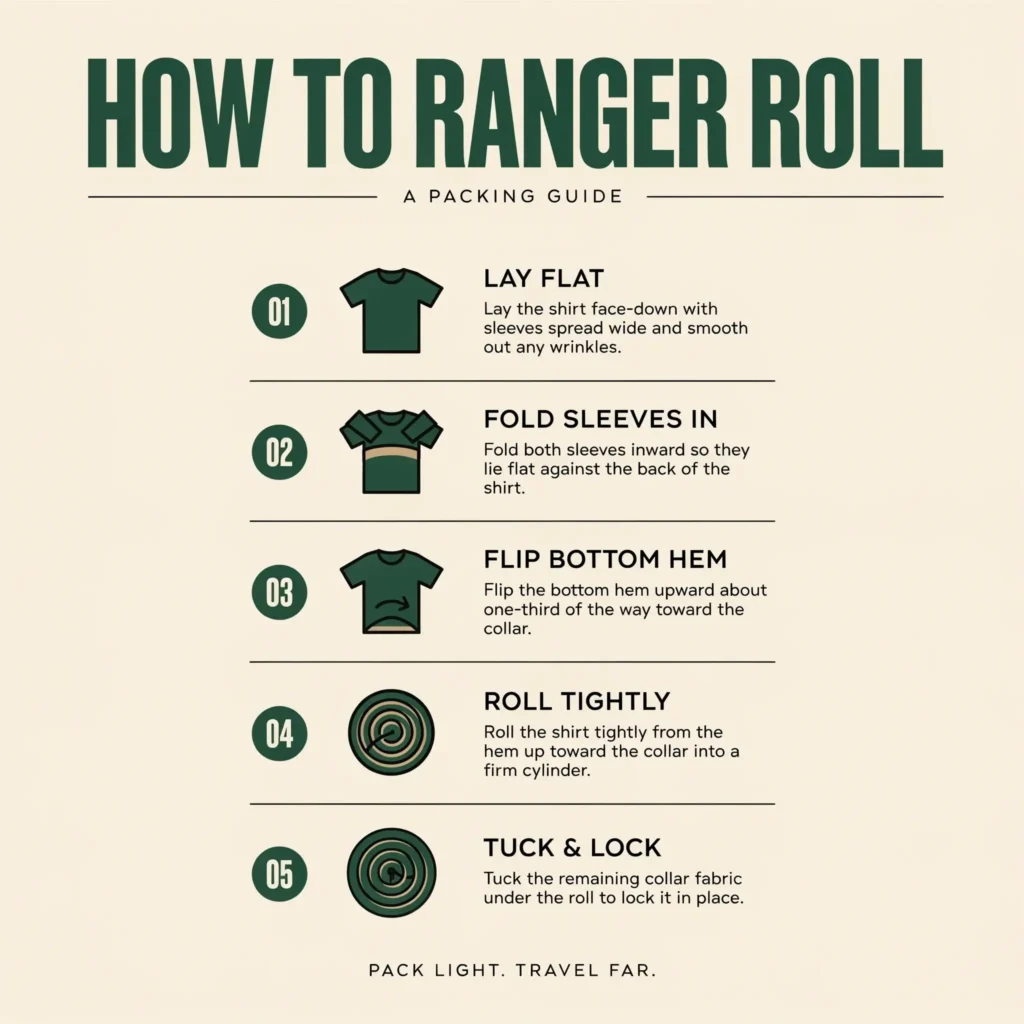
Lay your shirt flat, fold the sleeves into the center to create a clean rectangle, flip the bottom two inches of the shirt inside out to create a cuff, and roll the fabric down from the collar as tight as a sleeping sleeping pad. Once rolled, pull the bottom cuff back over the entire roll to secure it. This creates a tight, dense fabric burrito that slides perfectly into a compression cube.
RANGER ROLL METHOD:
Step 1: Lay shirt completely flat.
Step 2: Fold sleeves into the middle to form a straight column.
Step 3: Flip the bottom 2 inches of the hem inside out.
Step 4: Roll tightly from the collar all the way down to the bottom.
Step 5: Tuck the entire roll into the inside-out hem cuff to lock it.
Organizing by Category
Use different colored compression cubes to organize your gear by function:
- Green Cube: All your warm insulation layers and rain gear.
- Blue Cube: Your daily t-shirts, quick-dry underwear, and hiking socks.
- Grey Pouch: Your minimal, travel-sized toiletries.
This layout means you never have to empty your entire backpack onto a dirty hostel floor just to find a clean pair of socks. You simply open your bag, grab the blue cube, and zip it back up.
Practical Luggage Weights and Official Guidelines
If you are planning to travel light and avoid expensive checked luggage fees on budget regional airlines, keep your total backpack weight under 15 pounds (7 kilograms). This is the standard carry-on limit for most small airlines across Europe and Asia.
To ensure your bag complies with international safety regulations, customs rules, and visa restrictions before booking your flights, it is always best to double-check the entry requirements and travel alerts posted on the US Department of State Travel site to avoid any surprises at the gate.
The Master Packing Checklist for Adventure Travelers
To pull all of this together, here is a comprehensive checklist of items that have been field-tested across dozens of countries. This list is designed to fit easily into a standard 40-liter carry-on backpack with room left over for local souvenirs.
1. Apparel (The Layering System)
- [ ] 3 Moisture-wicking merino wool or synthetic t-shirts
- [ ] 1 Long-sleeve lightweight sun-protection shirt
- [ ] 2 Pairs of quick-dry adventure pants (with stretch fabric)
- [ ] 1 Pair of lightweight athletic shorts
- [ ] 4 Pairs of quick-dry synthetic underwear
- [ ] 3 Pairs of merino wool hiking socks (prevents blisters)
- [ ] 1 Packable synthetic down jacket or grid fleece
- [ ] 1 High-quality waterproof rain jacket with hood
2. Footwear
- [ ] 1 Pair of broken-in trail running shoes (with deep grip soles)
- [ ] 1 Pair of secure adventure sandals (with sturdy heel straps)
3. Gear & Electronics
- [ ] 1 40-Liter lightweight carry-on backpack
- [ ] 1 15-Liter packable daypack (for daytime walking tours)
- [ ] 3 Ultra-lightweight nylon compression cubes
- [ ] 1 10,000mAh fast-charging external power bank
- [ ] 1 Universal global travel wall adapter
- [ ] 1 Compact e-reader loaded with travel guides
- [ ] 1 3-Liter lightweight silicone dry bag (protects tech)
4. Health, Hygiene & First Aid
- [ ] 1 Pocket travel medical pouch (zinc oxide tape, antiseptic wipes, antibacterial ointment)
- [ ] 5 Packets of oral rehydration salts
- [ ] 1 Strip of emergency loperamide tablets
- [ ] 1 Small bottle of high-DEET insect repellent
- [ ] 1 Solid mineral sunscreen stick (won’t leak in your bag)
- [ ] 1 Travel toothbrush and concentrated toothpaste tube
- [ ] 1 Quick-dry microfiber travel towel
Final Thoughts: Focus on the Experience, Not the Gear
When you are preparing to step out of your comfort zone, remember that the goal of travel is personal growth, curiosity, and deep cultural understanding. It is not about having the most expensive, brand-new gear from an outdoor catalog, and it is certainly not about showing off a perfect, luxurious lifestyle on social media.
Some of the most memorable moments of my life didn’t happen because I had the perfect gear. They happened because I was flexible enough to handle challenges when things went wrong. They happened when I sat on a plastic stool on a busy sidewalk, laughing with locals over a hot bowl of noodles, or when I stood under a tin roof waiting out a sudden tropical rainstorm with a group of fellow backpackers.
Lightening your physical load frees up your mind. It removes the stress of managing heavy luggage and lets you say “yes” to unexpected adventures—like jumping onto the back of a local ferry or changing your plans at the last minute to explore a remote village with a new friend. Pack with intention, leave your fears behind, and start creating your own meaningful journey. The world is waiting for you, and it rewards the curious and the brave.